Saturday, February 8, 2014

Mold time!

I received my silicon yesterday and after letting it warm up for a day inside I am making the mold for the explosion markers. Based on what the company said, this material they provided to me (aka sample) withstands resin extremely well. Once the mold has time to cure, I'll need to remove the modelling clay I used so I can pour the second part of the mold. 

I decided to make a 2 part mold due to the complexity of the markers, so it'll make demolding the resin that much easier. Unfortunately, this is the first time I've done a 2 part mold - in the past I've done tons of single stage molds, but this is a whole different animal. 

So here is what I have so far today:

Is there nothing LEGO can't do?
So how did I make the mold? I took modelling clay and surrounded the markers (2 in this case) halfway around them. Once I had that done, I filled the rest of the mold cavity with clay so that it provides a flat surface for the second piece of the mold. I then pour the silicon and let it set. Once that is set, I'll flip the form and remove all of the clay. Once the clay has been removed, I'll use mold release and spray the living crap out of the piece of poured today. After that I'll pour a second batch of silicon and wait for that to cure. After that I should have a 2 part mold and the only thing I'll have to do is clean up the mold fill points so I can pour the resin.

More tomorrow...

Friday, February 7, 2014

Bogged Down markers

So I'm always one to make the board a little more "cool looking" whenever i play, and I've seen these someplace before (I can't remember the site i was on). I thought I'd make a few for myself since I had some spare figures laying around after a recent trade. I decided to paint the troops up in the Summer Oak Leaf uniforms, just to make them stand out a little more. 

I think what I'm going to do once I get some bailed out figures that I'm going to make some of these that represent bailed out. I think I'll use red striping on the side (again I saw it on the same site) to help differentiate them on the table.

What do you guys think?


Wednesday, February 5, 2014

Bastogne Church

My replacement Bastogne church finally arrived today. I have to say thank you to Battlefront to sending this thing out fast for me. My original church arrived and it had a piece chipped off of the roof above the back door.

Just how I like my Sherman's -- nice and toasty!
While this wouldn't normally bother me, the problem was the piece missing was about the size of a quarter and was nowhere to be found in the package. After taking some pictures and sending them to BF's customer service, they sent me a return label to send it back. Total time from the time I received my original damaged church to the receipt of the fixed church: 1 week.

One thing I have to commend BF on was the amount of packaging they included inside of my replaced church. Inside of the church were foam peanuts, as well as every nook and cranny in the box to keep the church from moving around. 

Overall I'm quite happy with the church, even with all the delays in production. I would give this a 10 out of 10 stars - especially given BF's customer service treatment.

So without further delay, some pictures...

The 3 pieces of the church, with a Tiger Ie for size comparison

Side of the church

Reverse side of the church


Destroyed Markers

Growing tired of using cotton balls for my flaming wrecks when playing Flames of War, I finally decided to make my own smoke plume markers. While the first attempt took me a few hours, I'm finally proficient in making 5 in about 20 minutes (that's not including glue drying time).


Once my sample of RTV arrives in them ail (any day now) I'm going to make a 2 part mold of a few of these and try casting them with resin. I'll post up more on that project when it arrives.

if you are interested in acquiring some of these, I'm selling them $5 each, or 5 for $20. Just send me an email and I'll contact you with the specifics.

Summer Oak Leaf

Lately I've been toying around with different camo patterns for my german army. My latest attempt has been Oak Leaf - both Summer and Autumn. While I'm not sure which version I like the most, I'm still going to try Autumn some more.

Autumn Oak Leaf 

Summer Oak Leaf

Tuesday, February 4, 2014

Open Fire! US Force

Here are some pictures of my Open Fire US paratrooper forces. Since i mainly play German forces, these are just sitting unused in the box they came in. 

I painted them up thinking my kids would want to play with me, but I quickly found the rules to be a little hard for them to understand. they just like to go PEW PEW and not have to worry about things like "Gone to Ground", "Dug In" or "Bailed Out" .

All of the guns and tank commanders are on magnets so they come off if you don't spend the points for them.


The Shelf of Shame

You might ask me-- So what do you have on the shelf of shame? the answer to that would be "Tank, and lots of them."

The primary reason is that I'm waiting for my Grex Tritum Airbrush to arrive for my birthday, and once I have that I'm going to go nuts painting hard edge and soft edge 3 tone camo on all of my tanks.


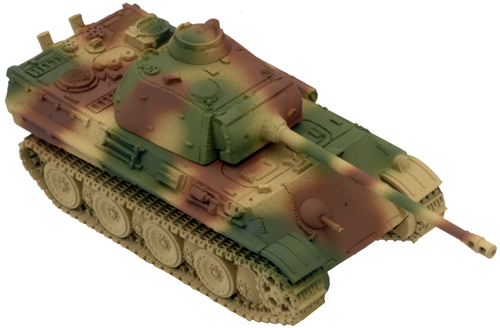
Soft Edge Camo
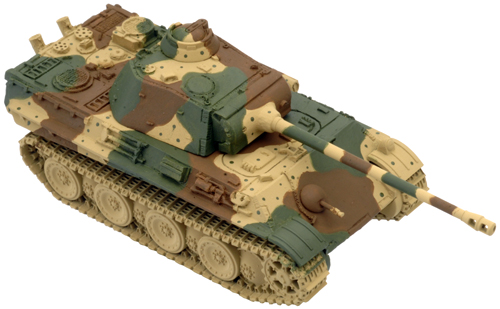
Hard Edge Camo


 So what exactly is on the shelf of shame? Well here is a picture of what is on there followed by a list:
The LITERAL Shelf of Shame
  • 5 Stug IV's
  • 5 Tiger Ie's
  • 5 Panther G's
  • 4 Jagdpanther's
  • 5 Hetzer's
  • 1 Bergepanther
  • 3 Konigstiger's
  • 3 Horch Kfz 15's
  • 3 Sd Kfz 7 (8t) half-track's
  • 2 Steyr 1500 Kfz 70's 
  
As you can see I have some Panzer IV's and Kettenkrad's  painted up. I just need to get some decals to apply then those will be done.